Ultrasonic Range Finder Circuit Diagram While giving the connections make sure that Vcc of ultrasonic module is connected to 5V DC; Switch on the board supply; Place the obstacle in front the ultrasonic module, now you can observe the distance on LCD. Switch off the board supply. Ultrasonic Rangefinder Project Applications. Used to measure the obstacle distance. By rickatt in Circuits Arduino. 1,547. 5. 2. Introduction: Ultrasonic Range Finder Tutorial With Arduino & LCD . Many people have created Instructables on how to use the Arduino Uno with an Ultrasonic Sensor and, sometimes, also with an LCD screen. I have always found, however, that these other instructables often skip over steps that are not

In this Arduino tutorial I will show you how to use the HC-SR04 ultrasonic sensor and integrate it with an LCD display, so that it can display the distance between the sensor and certain objects. Materials Needed: - Arduino UNO - Breadboard - 16 x 2 LCD Display - HC-SR04 Ultrasonic Sensor - 10K Potentiometer (Comes with LCD display linked above) The ultrasonic range finder I'll be using in this tutorial is the HC-SR04, which can measure distances from 2 cm up to 4oo cm with an accuracy of ±3 mm. In this article, I'll show you how to make three different range finder circuits for the Arduino. The first range finder circuit is easy to set up, and has pretty good accuracy. The other In this circuit a 16×2 LCD display is used for displaying the distance. The distance in cm and inch are displayed simultaneously on the LCD screen. Before attempting the LCD version, go through this article: Interfacing LCD to Arduino. Circuit diagram of the LCD range finder is shown below. Circuit diagram: LCD range finder. Program: LCD range
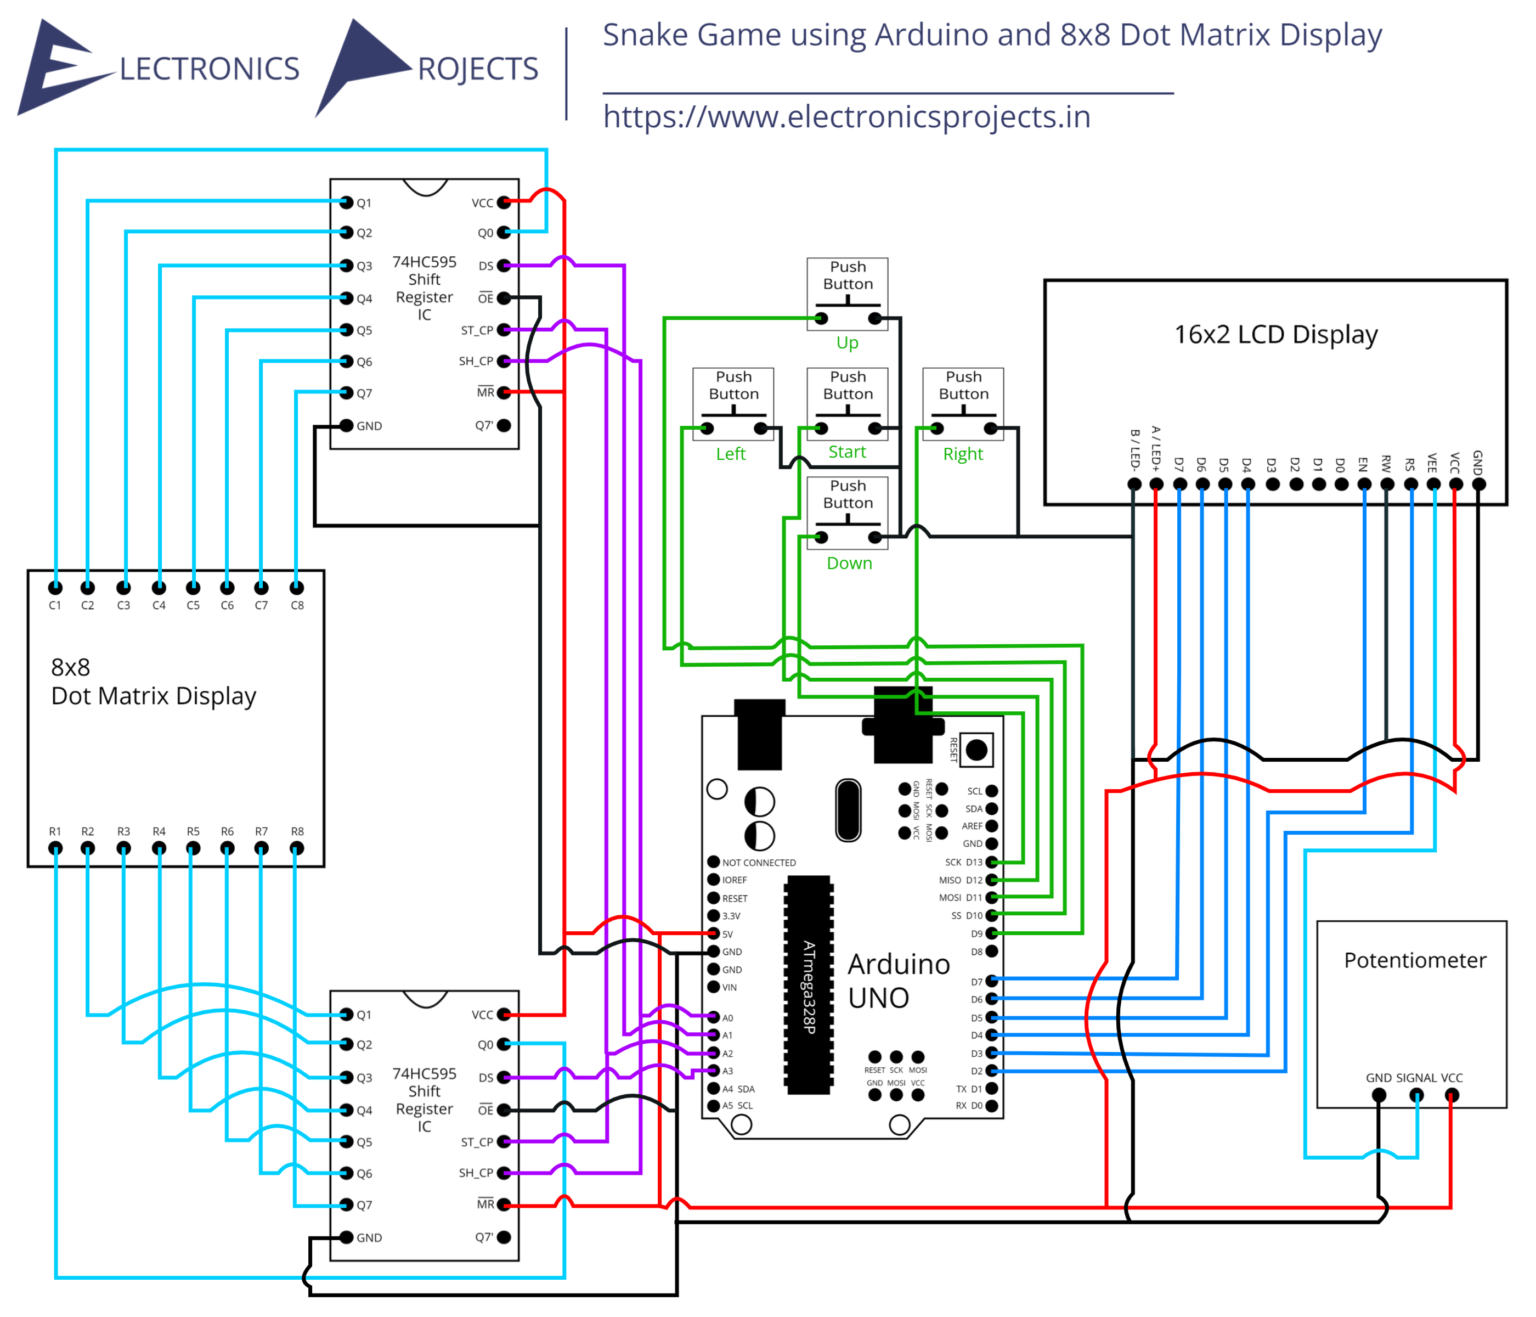
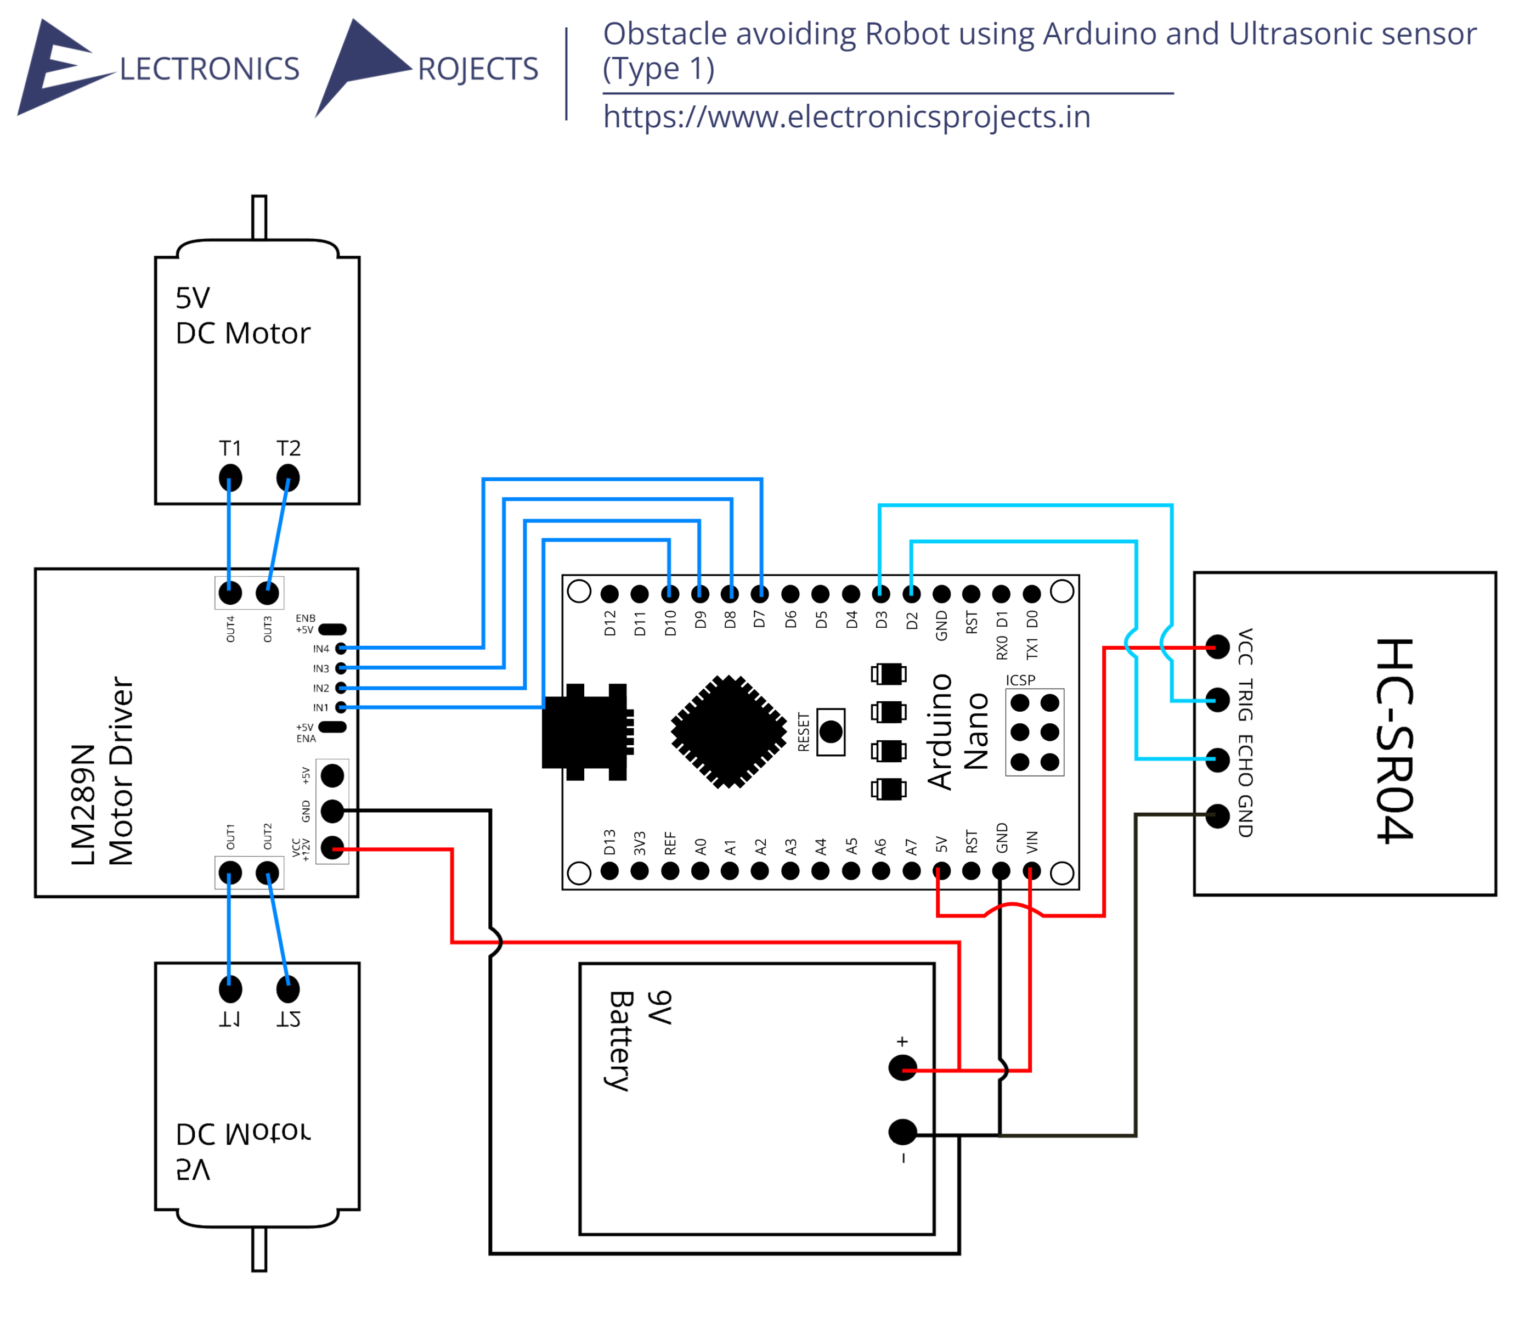
How to Set Up an Ultrasonic Range Finder on an Arduino Circuit Diagram
The HC-SR04 ultrasonic range-finder module (photo 1) provides non-contact measurements in the range 2cm - 400cm. the rising edge of the "Echo" pin during which time high energy +/-10 volt charges are built up in the transmitter circuit prior to the ultrasonic burst. The "Echo" pin drops LOW on receipt of an echo signal or 210mS How the Ultrasonic Range Finder Measures Distance. On the front of the ultrasonic range finder are two metal cylinders. These are transducers. Transducers convert mechanical forces into electrical signals. In the ultrasonic range finder, there is a transmitting transducer and receiving transducer.

This instructable describes how to create a non-contact range-finder using an Arduino and an HC-SR04 ultrasonic module to measure distances in the range 2cm - 400cm. The accuracy is typically +/- 3mm depending on distance, air temperature, and humidity. For this range finder, we use an UltraSonic sensor to measure the distance between two points. The principle of operation for this sensor is measuring the distance traveled by sound in a given time. The sensor generates high-frequency sound waves which hit the nearest obstacle and create an echo.

Ultrasonic Range Finder Tutorial With Arduino & LCD Circuit Diagram
How the Ultrasonic Range Finder Works. Before we can learn about how our project can determine the distance from a distant object, we first need to understand what ultrasound is. Ultrasound is a sound wave whose frequency is beyond that of human hearing (usually greater than 20kHz).