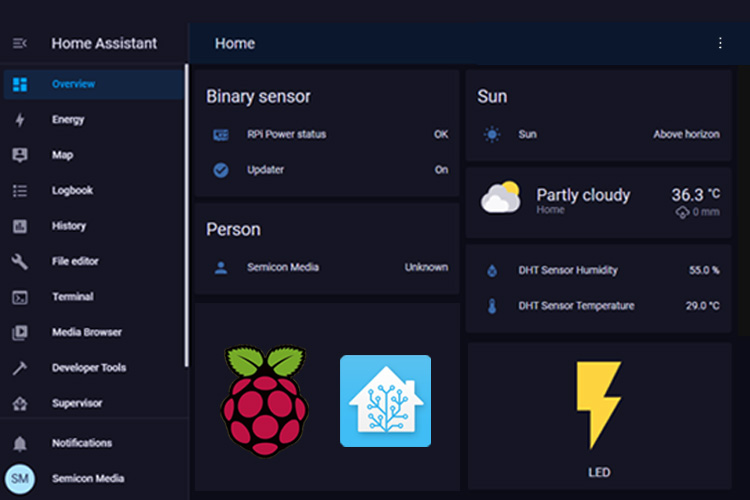
Getting started with Home Assistant Raspberry Pi 4 Control and Circuit Diagram Step 01: Your new Home Assistant. To make our home a more fun place to be, we're going to set up a home automation system. This is software that can communicate with multiple devices and make changes to your environment based on a rule set. Sounds a bit complicated, but the 'HA' scene has got a lot friendly over the past few years.
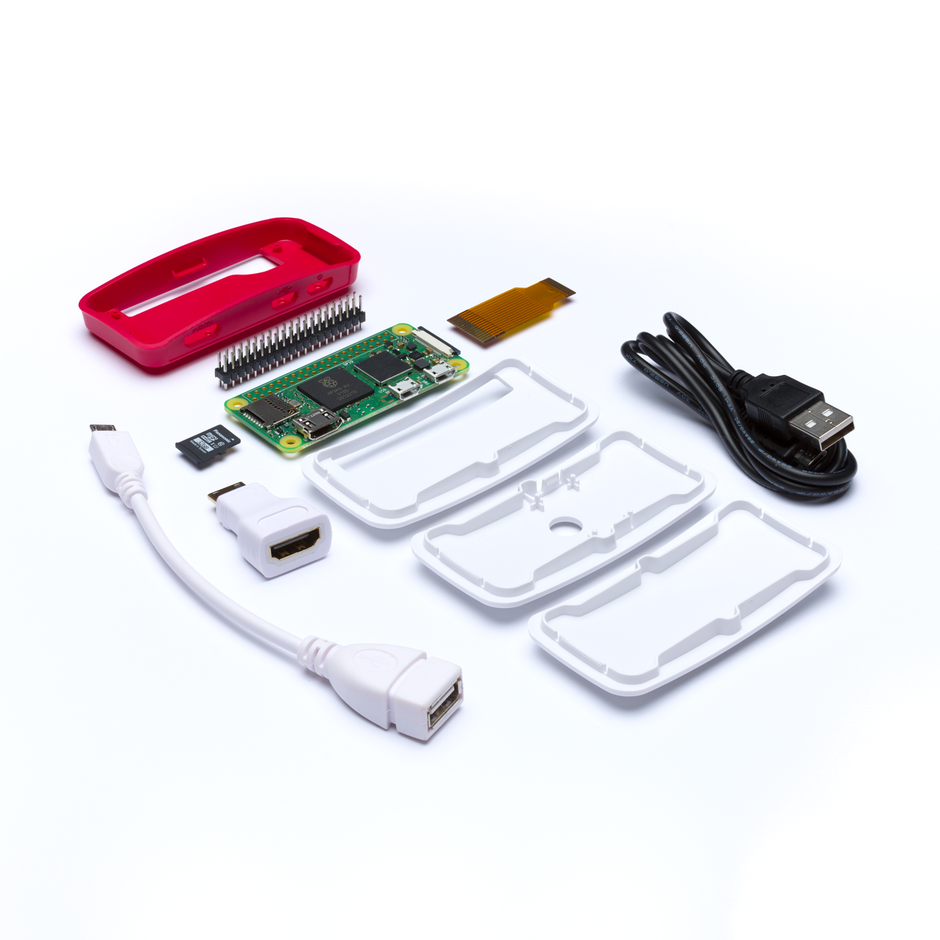
In conclusion, when one melds the capabilities of Home Assistant with the versatility and efficiency of the Raspberry Pi, they get a home automation powerhouse. It's a blend that offers users a high degree of control, customization, and future-proofing, all without a hefty price tag. Wait for the Home Assistant OS to be written to the SD card. Eject the SD card. Start up your Raspberry Pi . Insert the SD card into your Raspberry Pi. Plug in an Ethernet cable and make sure the Raspberry Pi is connected to the same network as your computer and is connected to the internet. Connect the power supply to start up the device. A smart home built with the Raspberry Pi 5 and Home Assistant offers a powerful, flexible, and private solution for modern home automation. From lighting and security to climate control and appliance management, this guide provides the knowledge and steps to create a responsive, efficient, and highly customizable smart home.
How to Install Home Assistant on Raspberry Pi: Complete Beginner's ... Circuit Diagram
One popular platform for home automation is Home Assistant, an open-source software that allows users to control and automate devices in their home. In this article, we will walk you through the process of installing and setting up Home Assistant on a Raspberry Pi, a popular single-board computer that is perfect for running home automation Creating Your First Home Assistant Automation. The true magic of Home Assistant happens when you start creating automations—actions that happen automatically based on triggers like time, device states, or your location. Let's create a simple but useful automation to get you started: Example: Automatic Evening Lighting
In this beginner's guide, I'll show you how to build a home automation hub using Home Assistant on Raspberry Pi 4. You'll learn how to: - Set up Home Assistant on Raspberry Pi - Choose proven smart home gear - Integrate your devices with the platform - Create helpful home automations - Create an easy user interface - Lots more Summary Home Assistant: Known for its user-friendly interface and extensive integrations, making it a great choice for beginners and advanced users alike. openHAB: Offers extensive customization and supports a wide range of devices and protocols, ideal for those who want a highly flexible system. Domoticz: Lightweight and easy to set up, suitable for basic home automation needs with a focus on Summary: This guide will help you install Home Assistant on a Raspberry Pi (e.g., Pi 5 or 4) and get started with smart home automation.We'll cover what hardware you need, how to install Home Assistant using Docker (Home Assistant Container) or Home Assistant Supervised (on top of a Linux OS), initial setup of the interface, adding devices (Zigbee, Z-Wave, Wi-Fi), creating basic automations
